Showing posts with label handmade. Show all posts

Friday, April 11, 2014

Pretzswords: Soft Pretzel Swords

Soft Pretzel Swords for Your Food Arsenal
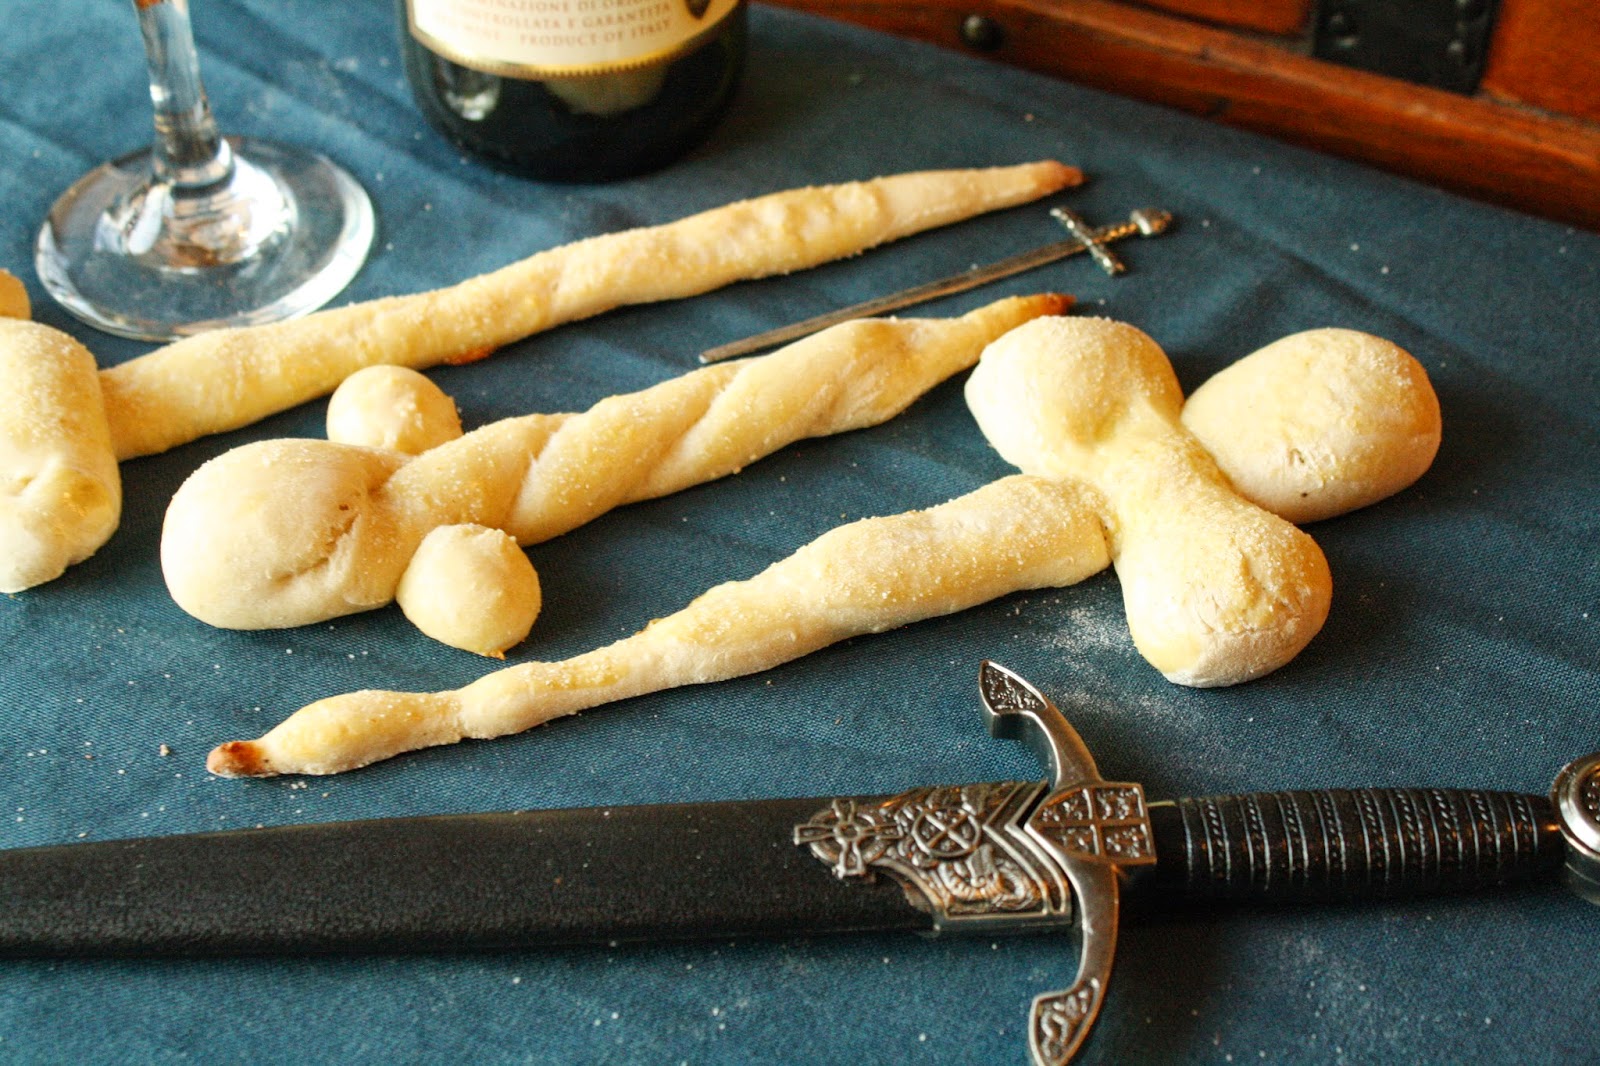


Everyone needs a few armaments round the table. So why not make them delicious as well? The characters of Westeros seem to always be heavily armed - even at dinner. Here at House Cook, our arsenal is equipped a little differently. Sure, we have a couple of broad swords lying around, but when it comes to food our swords are completely edible.

If you love soft pretzels, then follow our recipe and shape them into pointed swords and knives that will make you ready for battle...or maybe just snack time. Whether you're fighting or eating, we recommend you always have a pretzel on your side.
Prep time: 30 minutes
Bake time: 10 minutes
Makes 8-12 Pretzels (less or more depending on how big you make them)

Ingredients:

1 1/2 cups lukewarm water
1 packet active instant yeast, or 2 1/4 tsp
1 tsp salt
1 Tbsp sugar
3 3/4 - 4 1/4 cups flour
1 egg
Salt for flavor

Step 1: Preheat the oven to 425 degrees and prepare a baking sheet with parchment paper.

Step 2: Dissolve the yeast in the lukewarm water. Stir gently with a spoon for about one minute until mixed. Add salt and sugar and stir until thoroughly combined. One cup at a time, add in three cups of flour. Mix with a wooden spoon while you add until the dough is thick. Add flour a quarter cup at a time until it is no longer sticky. 

Step 3: Flour a flat surface. Place the dough on top and knead if for about three minutes. Shape into a ball. Separate the dough into sections for the pretzels. You can make each pretzel as big or small as you want.

Step 4: To shape the swords, we used two different techniques. The first is to roll the dough into a long rope. Fold the rope in half and twist it together. Shape the end into a point and add two clumps of dough at the thicker end for the hilt of your sword. The other technique is to roll the dough into a long rope. Flatten the rope and then pinch it together with two finger. Pull one end into a point. Now take a smaller piece of dough and make a hilt that is large at the ends and thin in the middle. Lay the hilt over the top of the sword. Place each sword on the parchment paper when it is complete.

Step 5: Beat the egg into a small bowl. With a brush or your fingertips, spread egg over the top of you pretzels. Sprinkle with salt. (I like to use garlic salt on my pretzels). Place pretzels in the oven for ten minutes or until the bottom is golden brown.

And that's it! An easy and quick pretzel recipe with a Game of Thrones twist. We hope enjoy this great treat for a regular snack or a Game of Thrones viewing party.


Tuesday, August 6, 2013

Kingsroad Peanut Butter Bars


Reese's Dark Chocolate Peanut Butter Cup Bars

We love Reese's. Naturally, while we watched Jamie Lannister slog through the mud of Kingsroad this past season, we thought: Reese's! So today we've whipped up a batch of Reese's Peanut Butter Cup Bars that are an easy treat for a hot day. And as dark chocolate fans, naturally we used ark chocolate chips. 

So today, when you're traveling down the Kingsroad in the heat, sit back and relax for a minute while you enjoy this simple dessert.

Prep time: 15 minutes
Fridge time: 2 hours
Makes: 9x13 pan

Ingredients:

1 1/2 c peanut butter
1 1/2 c powdered sugar
2/3 c crushed graham crackers
2 Tbsp butter

4 cups dark chocolate chips
4 Tsbp shortening

Step 1: Mix together peanut butter, sugar, graham crackers, and butter. Spread across the bottom of an ungreased 9x13 inch pan. 

Step 2: In a double boiler, melt chocolate chips and shortening together. Pour evenly over the peanut butter mix. Place in the refrigerator for 2 hours or until top is solid.

And that's it! Super simple and delicious. Cut it into bars and enjoy!


Thursday, August 1, 2013

Beyond the Wall Pizza


Cheese and Tomato Pizza with No Yeast Pizza Dough

We started our Beyond the Wall series with our fast and delicious 3 Ingredient Peanut Butter Cookies. Now we'd like to bring you a main course that's quick, easy, and will leave your mouth watering for more.

Here at Cook's Landing we love pizza. Over the years we've perfected that love into a recipe with piles of tomatoes and four kinds of cheese. Of course our impatience to eat the pizza means we don't like waiting for yeast to rise. So instead we use this simple no yeast recipe.

No Yeast Pizza Dough...

Prep time: 15 minutes
Bake time: 20-25 minutes
Makes 2 pizza bases

Ingredients:

2 c flour
2 tsp baking powder
1 tsp salt
2/3 c milk
1/4 olive oil
2 Tbsp olive oil - to brush on dough

Step 1: Preheat oven to 425 degrees. Stir together ingredients (except 2 Tbsp of olive oil) in a large bowl. In the bowl, gather the dough together and press it into a large ball.

Step 2: Knead dough in the bowl until smooth. Split ball in two and place on a lightly floured surface. Roll each half into a roughly 13 inch circle. Place on pizza pan. Turn up the edge and pinch into 1/2 inch ridges to finish your crust. Brush the 2 Tbsp olive over the surface of the dough.

How to decorate the pizza...

You'll need:

Pizza sauce
1 can of dice tomatoes
Italian Seasoning
Crushed Red Pepper
Garlic Powder
Onion Powder
Crumbled feta cheese
2 roma tomatoes
Romano cheese
Provolone cheese
Parmesan cheese

Step 1: Spread a thin layer of pizza sauce over the surface of the dough. With a spoon, scoop out diced tomatoes from the can and cover the surface of the pizza dough, placing a tomato chunk on every 1/2 inch of the dough.

Step 2: Lightly sprinkle Italian seasoning, crushed red pepper, garlic powder, and onion powder over the surface of the pizza. Sprinkle feta cheese crumbles over the entire pizza.

Step 3: Slice roma tomato into thin slices and place evenly over the surface of the pizza. Grate the remaining three cheeses and sprinkle over the pizza until the roma tomatoes are only slightly visible beneath. Don't put too much cheese - unless you're a huge cheese fan, and then have fun!

Step 4: Bake for 20-25 minutes or until the pizza looks done (slightly brown on top).

And that's it! A pizza with so much flavor, it'll melt in your mouth. This cheesy tomato pizza will leave you wishing you'd made more.


Thursday, July 25, 2013

Flamingo Incognito: Colorful Dragons to Decorate Your Lawn

Thanks to the wonderful world of Pinterest, I recently found some awesome pieces to decorate a lawn. We've all seen the pink flamingos sometimes (why the crazy those were invented, I'll never know) and some of the more clever/creative ways to decorate them, but this new artist takes flamingo alteration to a new level. 

Copper Dragon Flamingo Incognito
Artist Kate Higgins of CedarMoon Studio has been turning flamingos into camouflaged characters for a little while now. Her unique Etsy shop is filled with some of the zaniest, colorful lawn creations I've ever wanted to stick all over a yard to bother the suburban neighbors. They are fantastic! 

Smoke Dragon Flamingo
Although we like all of the Incognito Flamingos, the dragons are our favorites here at House Cook (naturally). 

Deep Purple Dragon Flamingo
Check out all of CedarMoon Studio's flamingos on Etsy, and follow them on Facebook for a dose of creative awesome everyday.