Showing posts with label dessert. Show all posts

Friday, April 18, 2014

Dragon Treat S'Mores Bars

Chocolate Chip Cookie S'Mores Bars for Your Dragon

If you're anything like we are, you've been killing yourself trying to think of a good treat for you and your dragon to share. Well look no more. You won't need a fire to toast these s'mores, but you will love the melted marshmallows, chocolate chips. and graham cracker crust. 

This original recipe uses chocolate chip cookie dough without brown sugar to create a s'mores cookie bar that even your dragon will want to keep eating. Our dragon loved it! Not to mention that this dessert is easy to make and takes no time at all. Who said you need fire to make a good fireside snack?


Prep time: 15 minutes
Bake time: 25-30 minutes
Makes a 9x13 pan or s'mores bars

Ingredients:

1 cup (2 sticks) softened butter
3/4 cup sugar
2 eggs
2 tsp vanilla extract
2 1/2 cups all-purpose flour
1 tsp baking soda
1/2 tsp salt
2 cups chocolate chips (I used mini chocolate chips)
1 bag (10oz) mini marshmallows
10 graham crackers
3 Tbsp melted butter


Step 1: Preheat oven to 350 degrees F. 

Step 2: In a large bowl, mix together the 1cup of softened butter and granulated sugar on medium speed. Add eggs and vanilla extract. Cream together.

Step 3: Stir together flour, baking soda, and salt in medium-sized bowl. Add dry goods to the large bowl and mix together thoroughly.

Step 4: Stir in chocolate chips completely. Add mini marshmallows and stir in. Make sure they are completely stirred through the dough.

Step 5: Using a food processor, crush the graham crackers. You can also do this is by putting them in a plastic bag and crushing the crackers with a rolling pin. Pour the graham crackers into a small bowl. Stir in 3 Tbsp melted butter. Using a spoon or your fingers, press the graham crackers mixture into the bottom of a 9x13 pan. Make sure the crust is evenly spread across the bottom.

Step 6: Spread the dough over the graham cracker crust in the pan. Bake at 350 degrees for 25-30 minutes or until the top of the marshmallows is beginning to brown. Test with a toothpick to make sure that it is cooked through completely.

Trust me, these cookie bars are delicious. The graham cracker crust and marshmallows add something extra to a cookie bar that will leave your mouth watering. Not to mention, your dragon's mouth.

Enjoy!


Monday, March 31, 2014

The Dirt and Mud of Westeros


Dirt: The Pudding and Oreos Treat to Roll Around In


As we gear up for the new season of Game of Thrones - which we couldn't be more excited for - we've noticed that the men and women of Westeros seem to really love mud! They're always rolling around in it until they're completely covered. We decided to jump in on this mud craze and see what all the fuss is about.

Of course, we couldn't just use regular dirt. We whipped up this delicious dessert and played in it instead. Let's just say that we all enjoyed eating it, but we're not sure any of us liked playing in it. There must be a trick in Westeros we're not aware of here...


Prep time: 30 minutes
Total time: 3 hours
Makes between 15 and 20 servings

Ingredients:

1 package of Oreo cookies
2 packages of instant chocolate pudding (3.9 ounces total)
4 cups milk
8 ounces cream cheese - room temperature
1/4 cup butter - room temperature
1 cup powdered sugar
8 ounces whipped cream
Gummy worms (we used sour ones. yum!)

Step 1: Crush the Oreos. This is easiest done in a food processor; however, we didn't have one on hand. If you're like us, put the cookies in a plastic bag and crush them using a rolling pin.

Step 2: In a large bowl, whisk together milk and pudding mix for two minutes, or until it thickens. Let stand for about 5 minutes.

Step 3: While the pudding is waiting, beat together the cream cheese and butter in a medium-sized bowl. On low speed, add in the powdered sugar slowly. Beat until it is thoroughly mixed and nice and fluffy.

Step 4: Fold the cream cheese, butter, and sugar mixture into the pudding. Then fold in whip cream until it's thoroughly combined.

Step 5: To serve we used small cups, though you could put the whole thing in a large pan. Either way, layer the mixture with alternating layers of Oreos and pudding, starting and ending with Oreos. Refrigerate for a couple of hours and then serve.

We hope you enjoy your dirt! Though, despite how fun it looks on Game of Thrones, we wouldn't recommend playing in it. It's kind of cold...and sticky...


Wednesday, January 15, 2014

Red Keep Treats: Raspberry & Dark Chocolate Meringues

 Raspberry Meringues with Dark Chocolate Chips


Valentines Day is close enough now that we can't stop thinking about sweets. Looking for a royal treat for your betrothed? Look no further than our raspberry flavored meringues with dark chocolate chips. Inspired by all of the betrothals and weddings in the Red Keep of King's Landing last season, our mouth-watery Red Keep Treats are the perfect sweet that will literally melt in your mouth. They're light and fluffy - just right for your sweetheart (arranged or not).

Besides, who doesn't want to feed their Valentine like a royal Southerner?


Ingredients:

2 egg whites
3/4 cup sugar
1 tsp raspberry extract
1/4 tsp cream of tartar
1/8 tsp salt
2 drops of pink or red food coloring
1 cup dark chocolate chips

Step 1: Preheat oven to 300 degrees. Prepare a cooking sheet covered with parchment paper.

In a medium-sized bowl, beat egg whites until soft white peaks form. To check for peaks, turn off your beaters and flip them upside down. Beat until peaks remain on the upside-down beaters.

Step 2: Add sugar, raspberry extract, cream of tartar, and salt. Beat until stiff peaks form. Test for peaks the same way as before. These cookies are naturally white, so I beat in pink food coloring. If you don't have pink, try using one or two drops of red food coloring for the same effect.

Step 3: Stiff in dark chocolate chips. Drop the mixture onto the parchment paper in small clumps, using a spoon. Space each cookie about 1 inch apart. Bake for 20 minutes.

And that's it! Let them cool, and enjoy. But be careful, these cookies crumble easily, so don't pack them too tight.


Tuesday, November 26, 2013

North of the Wall: German Black Forest Cake

A view over the hills of the eastern edge of Germany's Black Forest facing France

What's been keeping House Cook from having much chance to cook these days? Distance and many, many changes.

This has been a season of change for us all. Anna-Lara has found a job and has been getting used to a new rhythm of life, Katy-Lynn is preparing for college, Julianne is jumping into her exciting new world of high school, and the youngest of us has been working as her soon-to-be rockstar self, practicing piano and winning science fairs. Meanwhile, I, Sarah-Lambert, have moved to Germany.

Today is the first in our new series, "North of the Wall," featuring foods and drinks and adventures from Germany where winter is most definitely coming.

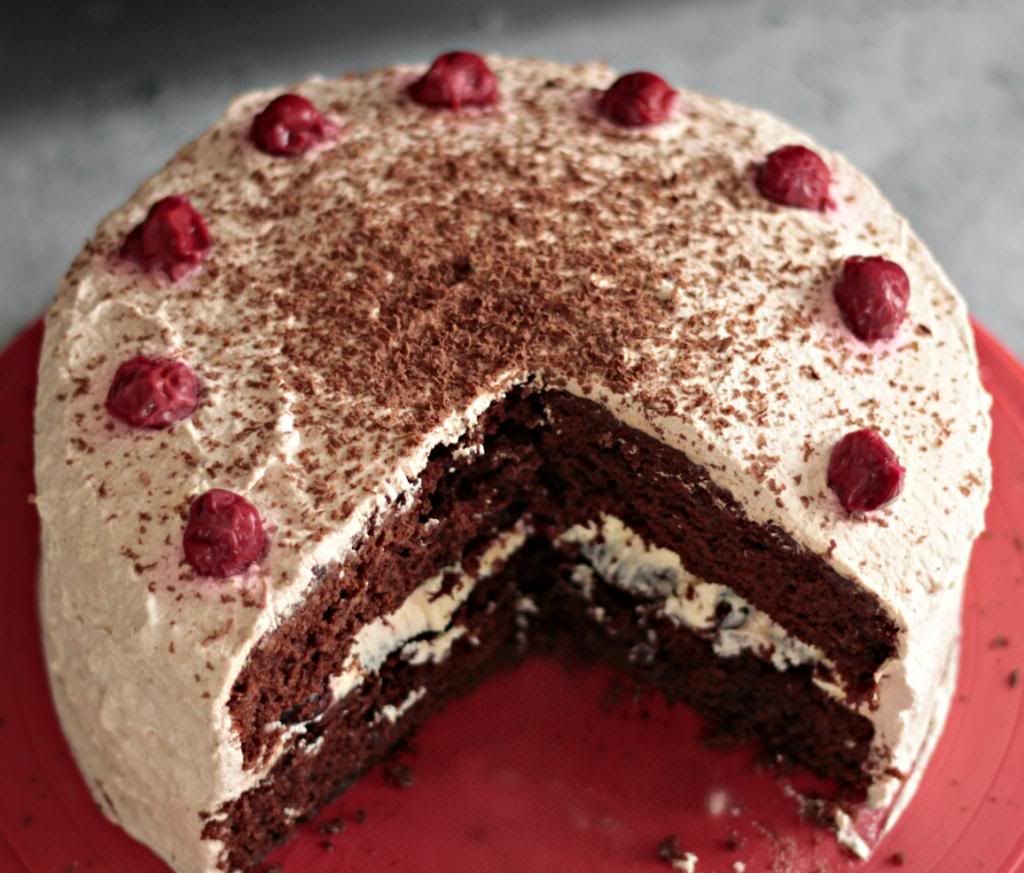
Feast your eyes on some delicious, traditional Black Forest cake:


Yeah... tasty looking, right? It certainly is.

When I first started looking for the recipe, I could find only German ones. Not too much of a problem since translating a recipe isn't the most difficult, but thankfully, I found one written up in English that is only a tiny bit different from the one in German (you can find the English one I used as reference here). The recipe we're sharing with you today from North of the Wall is a mix of these two recipes.


German Black Forest Cake

Moderate difficulty. Prep time 40-60 minutes (I took 60, but you're probably faster). Cook time 40 minutes.

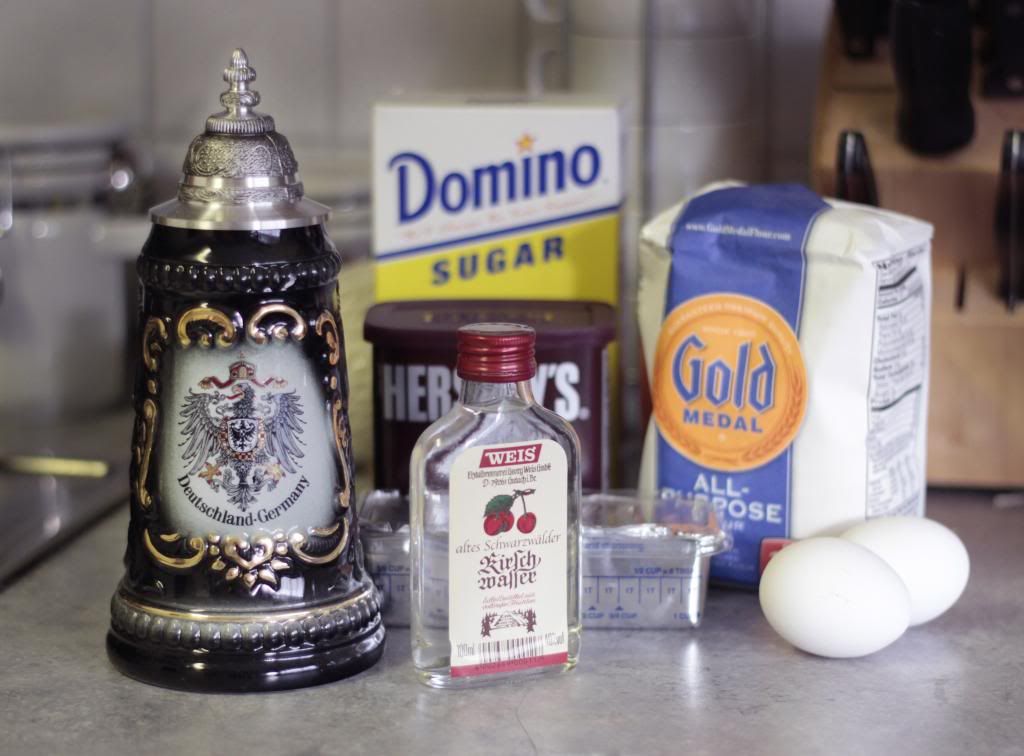
Ingredients: 

Cake:

1 2/3 cups   flour
2/3   cup unsweetened cocoa powder
1 1/2 tsp   baking soda
1 tsp   salt
1/2 c   shortening
1 1/2   cups sugar
2   eggs
1 tsp   vanilla extract
1 cup   buttermilk
2/3 cup   kirsch (cherry schnapps)

Filling: 

1 stick of butter, room temperature
1 3/4 cups powdered sugar
1 pinch of salt
1 tsp strong coffee or espresso brewed and cooled
1 (14 oz) can of dark sweet pitted cherries in heavy syrup

Whipped frosting:

2 cups heavy whipping cream
1/2 tsp vanilla
1 tbsp kirsch
1/2 tbsp unsweetened cocoa powder
grated semi-sweet chocolate for garnish
extra dark cherries for decoration


Step 1: Preheat oven to 350 degrees

Step 2: Line the bottoms of two 8 inch round pans with parchment paper (or tin foil) circles.

Step 3: Sift together flour, baking soda, cocoa, and salt and set mixture aside.

Step 4: Cream shortening and sugar until nice and fluffy. Then beat in eggs and vanilla.

Step 5: Slowly, add the flour mixture into the shortening mixture alternating with your buttermilk until they are thoroughly combined. **If the mixture seems too dry add a tiny bit more buttermilk**

Step 6: Pour the mixture into your pans and bake for 35-40 minutes.

Step 7: When the cake halves are both baked, allow them to cool thoroughly. Once cooled, poke holes all over them using a toothpick or fork and sprinkle the kirsch (cherry schnapps) over them generously. How much you use is up to how strongly you'd like the cake to taste of schnapps. Remember: the alcohol will not be baked off, so don't get crazy with it if you're making this sugar treat for your kids!

Step 8: Cream the butter until light and fluffy.

Step 9: Add the powdered sugar, pinch of salt, and coffee and mix thoroughly.

Step 10: Remove the cake halves from their pans. Place the first half on a plate and spread the mixture from steps 8 and 9 over the surface of the layer. Top this with the pitted cherries and their syrup. **I only ended up using 3/4 of the can. Use as little or as much of the cherry/syrup business as you think looks good**

Step 10: In a separate bowl, whip the cream to stiff peaks.

Step 11: Beat in the vanilla, cocoa and kirsch listed under "whipped frosting" in the ingredients.

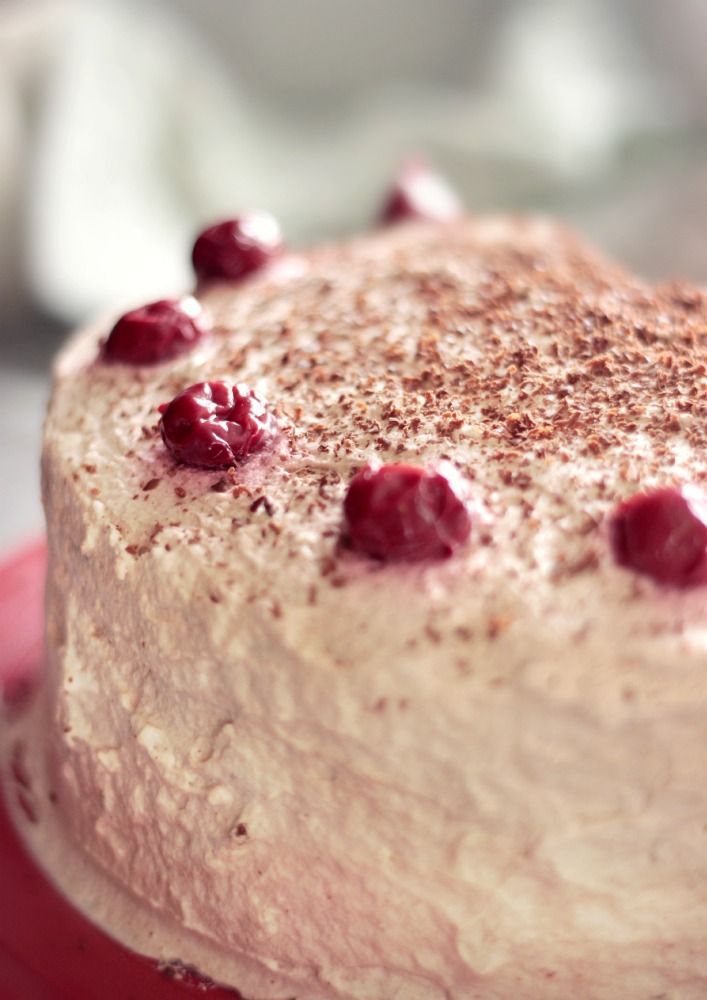
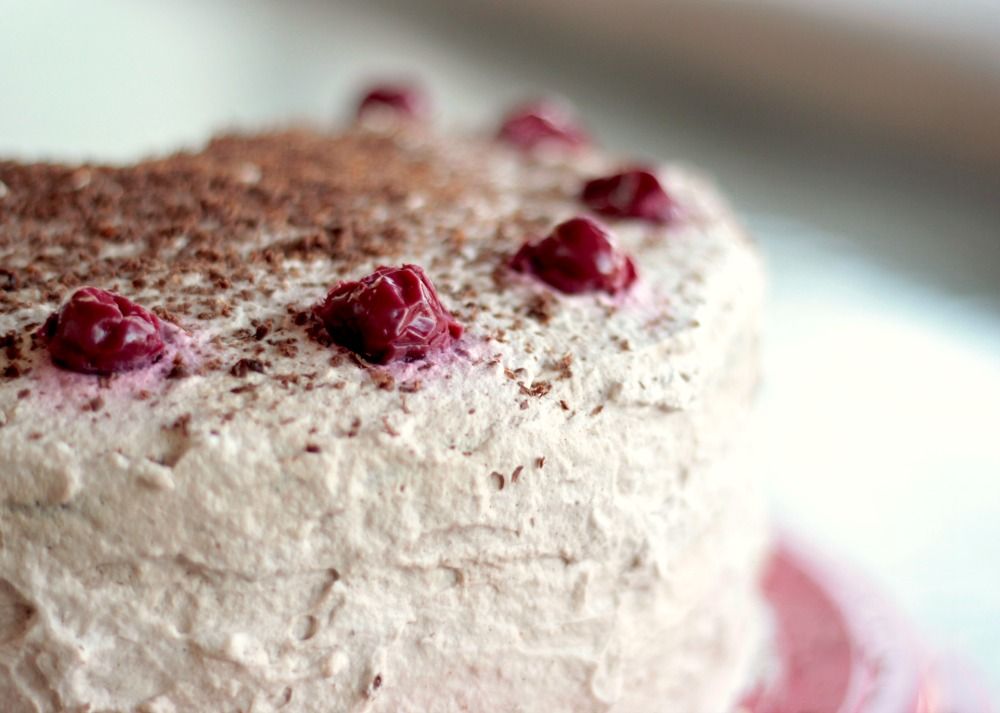
Step 12: Frost top and sides of cake and decorate with a dusting of chocolate shavings and a lining of cherries. Want more chocolate? Get crazy with your shavings and apply them liberally!

Keep the cake refrigerated until serving.


Monday, October 7, 2013

Winter is Coming: Apple Cider Cupcakes


Apple Cider Cupcakes with Cinnamon Buttercream Icing


Feel that chill in the air? Winter is coming. 

But for now, it's time to celebrate Fall. To help your taste buds adjust to the change in the weather, we've whipped up an easy dessert. Apple cider cupcakes, topped with cinnamon buttercream icing, are the perfect treat for autumn. These melt-in-your-mouth cupcakes will leave your house smelling like cinnamon. Not to mention that they match the colors outside.


Prep time: 30 minutes
Bake time: 19-22 minutes
Makes: about 15 cupcakes

Cupcake Ingredients:

2 eggs
1 2/3 c flour
2/3 c sugar
1 c apple cider (I made mine with instant apple cider mix)
1/2 softened butter
2 tsp baking powder
1 tsp cinnamon
1/2 tsp salt
1 tsp vanilla

Buttercream Ingredients:

1/2 c butter
1/2 c shortening
2 tsp vanilla
1 tbsp cinnamon
1 tbsp milk
1 bag of powdered sugar

Cupcakes:

Step 1: Preheat oven to 350 degrees. Prep cupcake tins with paper liners.

Step 2: Whisk together cupcake ingredients in a large bowl. Do not add cider while it's hot, or you'll cook the eggs.

Step 3: Fill cupcake liners about 2/3 of the way full. Bake for 19-22 minutes, or cooked through. Test with a toothpick.

Icing:

Step 1: Beat together butter, shortening, and vanilla until creamed. Stir in cinnamon.

Step 2: Beat in powdered sugar one cup at a time. When the mixture becomes thick, add 1 tbsp of milk and keep beating. Mix in the entire bag of powdered sugar. You will have extra icing. Either cut the recipe in half before you start, or store icing in the fridge.

To get the two-toned roses that I decorated my cupcakes with, divide your icing in half and color one half red and the other orange. Then follow the instruction here to create two-toned roses.

And that's it! A super easy recipe for fall. These cupcakes will definitely impress at any fall or Halloween party. Enjoy!


Tuesday, August 6, 2013

Kingsroad Peanut Butter Bars


Reese's Dark Chocolate Peanut Butter Cup Bars

We love Reese's. Naturally, while we watched Jamie Lannister slog through the mud of Kingsroad this past season, we thought: Reese's! So today we've whipped up a batch of Reese's Peanut Butter Cup Bars that are an easy treat for a hot day. And as dark chocolate fans, naturally we used ark chocolate chips. 

So today, when you're traveling down the Kingsroad in the heat, sit back and relax for a minute while you enjoy this simple dessert.

Prep time: 15 minutes
Fridge time: 2 hours
Makes: 9x13 pan

Ingredients:

1 1/2 c peanut butter
1 1/2 c powdered sugar
2/3 c crushed graham crackers
2 Tbsp butter

4 cups dark chocolate chips
4 Tsbp shortening

Step 1: Mix together peanut butter, sugar, graham crackers, and butter. Spread across the bottom of an ungreased 9x13 inch pan. 

Step 2: In a double boiler, melt chocolate chips and shortening together. Pour evenly over the peanut butter mix. Place in the refrigerator for 2 hours or until top is solid.

And that's it! Super simple and delicious. Cut it into bars and enjoy!


Monday, July 15, 2013

Beyond the Wall: 3 Ingredient Peanut Butter Cookies


Today we bring you the first recipe in our Beyond the Wall series. We'll be giving you easy-to-make recipes that our fast, no-bake, or low-ingredient. All things that will help you survive in the freezing tundra north of the Wall.

The first of these are our super simple, 3 ingredient peanut butter cookies. The youngest of our troop, and our hand of the kitchen, found herself north of the wall with our dire wolf and in desperate need of food. Luckily she remembered this recipe and was able to whip together something to nibble on. And our dire wolf loves peanut butter. If she hadn't baked these cookies, who knows what would have happened to them...


Prep Time: 5 minutes
Bake Time: 7-10 minutes
Makes: 30 cookies

Ingredients:

1 c peanut butter
1 c granulated sugar
1 egg

Step 1: Preheat oven to 350 degrees. Prepare a baking sheet covered in parchment paper.

Step 2: In a medium sized bowl, thoroughly stir or mix together peanut butter, sugar, and egg. Drop teaspoon sized balls of dough on the parchment paper. Space cookies roughly one inch apart. Bake for 7-10 minutes, or until the bottoms of the cookies are browner than the original dough.

And that's it! Delicious peanut butter cookies with only 3 ingredients. Now keep safe. It's cold beyond the wall, and dessert is coming.


Look out for more Beyond the Wall recipes coming soon.


Monday, July 8, 2013

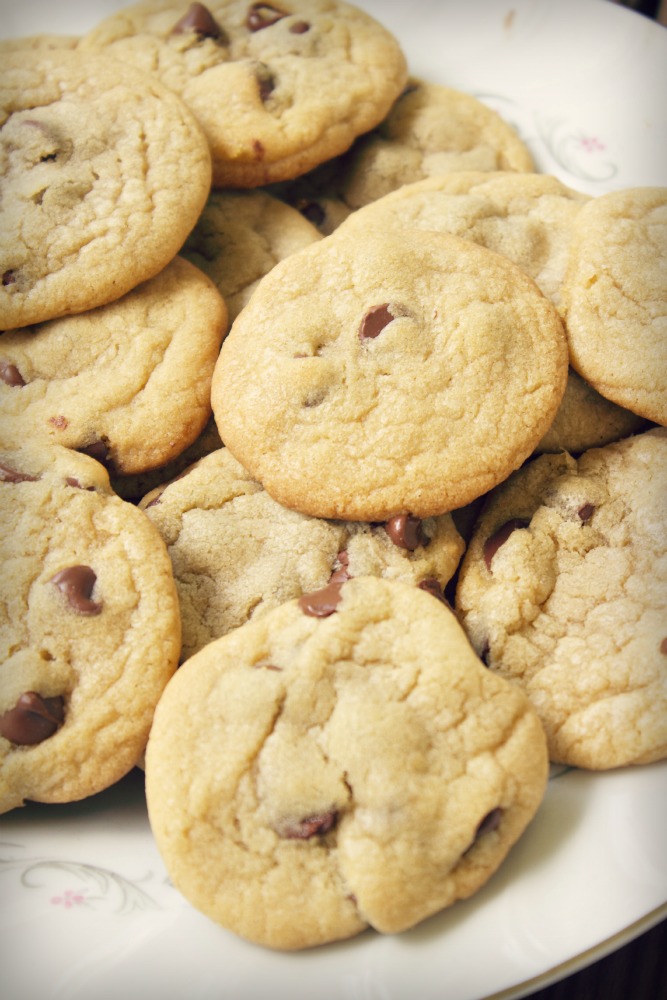
Dragon Droppings: Where Chocolate Chip Cookies REALLY Come From

Dragon Poo Chocolate Chip Cookies: delicious, gooey, good

Even delicious comfort food can come from the strangest of places...


Sure, dragon's spend most of their time burning things and looking menacing, but even they have to do their business at least once a day to maintain healthy dragon colons.

Whether your a wildling or a high-born, dragon droppings, when baked at 350 degrees, make an extremely delicious comfort food or dessert snack that's known to the locals as Chocolate Chip Cookies.

We've got a recipe for you to match all others and will be a sure-fire win at any Cook's Landing bake sale. So, let's bake us some dragon poo!


Dragon Poo Chocolate Chip Cookies Recipe

Makes roughly 24-28 cookies 

Ingredients

1/2 c shortening (or canola oil)*
6 tbsp white sugar 
6 tbsp brown sugar
1 egg
1/2 tsp vanilla extract
1 c and 2 tbsp flour
1/2 tsp salt
1/2 tsp baking soda
1/3 c semi sweet chocolate chips**

*We prefer Crisco, but canola oil also works if you're low on shortening, but it's soupier and bakes darker

**We've grown up on semi-sweet and haven't ever tried anything else, but chocolate chips all taste the same once they're in cookie form).

Step 1: Preheat oven to 350 degrees. Cream together your shortening (or canola oil) - microwave the
shortening for 10 seconds on medium power level or less to make it softer - white sugar, and brown sugar

Step 2: Once that's got a good creamy texture, mix in your egg and vanilla extract. Then mix in your flour, salt, and baking soda.

Step 3: Now comes chocolate chip time! Our recipe recommends 1/3 cup, but if you've got a clan like ours, cut open the bag and pour in chips until there's a 6 chips per 1 T. of dough ratio. At least. 

Step 4: Drop dough on an ungreased cookie sheet, spacing about 2 inches apart in about 1 tbsp dollops  If you used canola oil, you're probably gonna have to scoop and drop with a spoon, but if you used shortening then you can easily roll the dough into balls with your hands.

Step 5: Bake at 350 for 8-10 minutes or until golden brown. If you see the bottoms getting darker than the dough then they're done.

Set on a rack to cool or let them sit on the pans 'til you start seeing that they are mysteriously disappearing.

Enjoy the deliciousness! The Sisters of House Cook recommend a nice glass, or mug, of milk for optimal dipping, to accent the chewy cookies.

Delicious Chocolate Chip Cookies: the gooiest you'll ever enjoy | www.SongofSpiceandFire.com

Thursday, July 4, 2013

4th of July Special: The Hand of the Kitchen's Ice Cream Recipe


Our Hand of the Kitchen is the second in command whenever we bake, fry, or throw food at each other. Since the unfortunate, temporary demise of our last Hand by White Walker Sugar Cookies, we've had to instate a new force for decision making.

 Naturally, we went with our guts and everyone pointed at the youngest while simultaneously touching their noses not-it.

Today, our Hand brings you her very own recipe for the 4th of July while the rest of us blow up stuff in the name of liberty. Introducing, the proper way to eat your ice cream from the littlest hipster we know.


First, you'll need to make sure you have everything...

Vanilla Ice Cream with Berries Ingredients

blueberries
blackberries
strawberries
vanilla ice cream

homemade whipped cream ingredients:
1 c heavy whipping cream
1 tbsp powdered sugar
1/8 tsp of vanilla extract

Step 1: To make your whipped cream, whip your whipping cream, vanilla extract, and powdered sugar into a frenzy in a bowl until soft peaks form or it's the consistency you like best.

Step 2: Scoop 3 nice, round scoops of vanilla ice cream into a bowl.

Step 3: slice your strawberries and sprinkle strawberry slices, blueberries, and blackberries over your ice cream.


Doesn't that look delicious!

Vanilla Ice Cream with berries

Finally, add a couple of dollops of our homemade whipped cream to the top of your ice cream and start eating!

Here in the Atlanta area we really only have a matter of minutes to eat ice cream out on the front porch while it still counts as "ice cream" and not just "cream." Our Hand tried her best to finish her deliciousness as fast as possible so she could join in festivities.

4th of July Special: The Hand of the Kitchen's Ice Cream Recipe | www.SongofSpiceandFire.com

Happy 4th of July! From House Cook's littlest hipster and Hand of the Kitchen. 

The littlest hispter's ice cream recipe

Tuesday, July 2, 2013

White Walker Sugar Cookies: the zombified dessert that's out to get you

We thought they were cookies. We were wrong. So wrong. They were much more than mere cookies. After we removed them from the oven, things got ugly...


It started when we noticed that their eyes were blue. None of us remembered them having blue eyes. Weren't they brown before?

White Walker Sugar Cookies: a zombie recipe from ASongofSpiceandFire

Then they started to move...on their own. That's right. They got right up off the cookie sheet, as though they'd been reanimated. It got gruesome fast!

White Walker Sugar Cookies: the zombified dessert that is out to get you | www.SongofSpiceandFire.com

We tried to run, but it was useless. They were faster. Stronger. Invincible. We didn't stand a chance. Our only recourse was to burn the remaining unfrosted guys before they had a chance to attack.

Burning the Sugar Cookies--the only way to keep them from turning to White Walkers

Sadly, we lost a sister... but it could've been worse. We're not sure what we'll do with Katy-Lynn now. For the time being, we're keeping her locked up. Who knew cookies would turn her into a White Walker? Living in Atlanta, we're pretty used to the dodging zombies issue (The Walking Dead), but we never thought that White Walkers were a risk as well! I guess we were wrong.
White Walker Sugar Cookies claim their first victim

All we have to say is, watch out! Make the cookies because they are delicious, but be careful. Be on your guard. You never know what might happen when White Walker sugar cookies are on the loose.

If you're willing to risk your life, here's how to give them a try...

White Walker Sugar Cookies Recipe


Prep time: 20 minutes

Cook time: 8-12 minutes
Makes about 2 dozen cookies

Ingredients:

1 cup room temperature unsalted butter
1 1/2 cups granulated sugar
1 egg
2 tsp vanilla extract
2 3/4 cups flour
1 tsp salt
1 tsp baking powder

Step 1: Preheat oven to 350 degrees. In a large bowl, beat together butter and sugar. Add vanilla extract and the egg and beat thoroughly.

Step 2: In a medium sized bowl, stir or sift together flour, salt, and baking powder. Slowly add flour mixture to the large bowl, beating it in about 1 cup at a time until completely mixed together.

Step 3: Divide the dough into two large balls. On a floured surface, roll dough out to 1/8 inch thick. Cut with cookie cutters, dipping the cookies cutters in flour before cutting. Place cookies on an ungreased baking sheet and cook for 8-12 minutes or until they start to brown.

We decorated our cookies with simple sugar cookie icing that tasted delicious.

Icing ingredients:

1 cup powdered sugar
4 tsp milk

Mix together in a bowl using a fork or a whisk. Divide up the icing before you dye it. You might need to make more icing. We doubled the recipe.

White Walker Sugar Cookies recipe www.SongofSpiceandFire.com